Clockidor Build - Planning Phase

My first step and phase one of this will be to disassemble and strip the clock down to its skeleton, remove the clock face and mechanism, remove the door etce etc. then I'm going to sand everything down and get any imperfections cleaned up and sanded out. Once that's done I plan on sealing off any spaces or cracks in the main cavity and then making a block at the top of the cavity where it goes into clock face area to seal that off so humidity cannot easily escape. The next step from there will be finding out the right solution to see the cavity doors, the main one with the glass insert and then the bottom one as well where the box storage and humidification device will go.
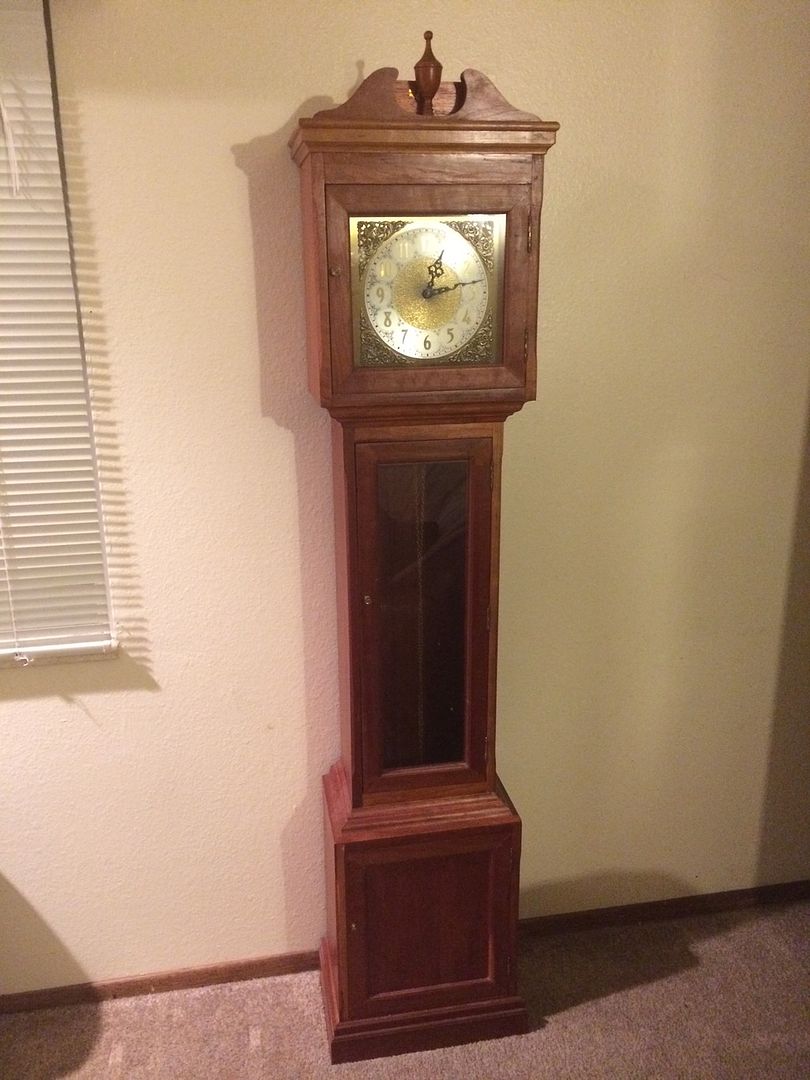
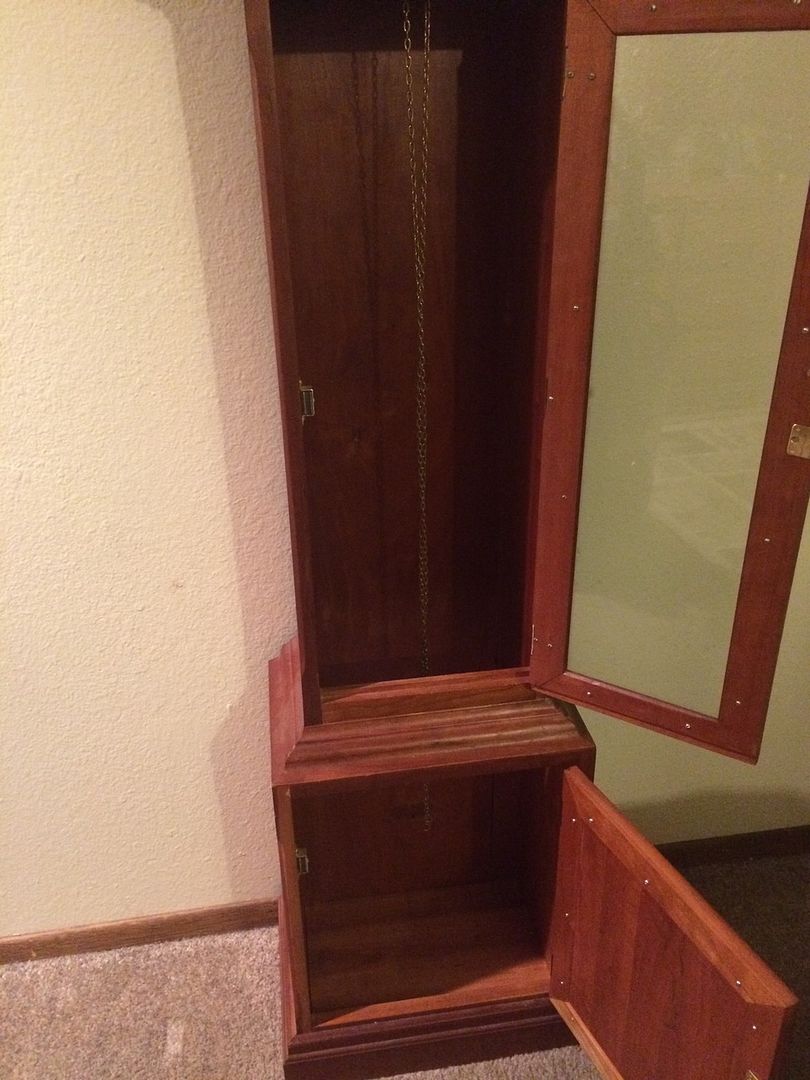
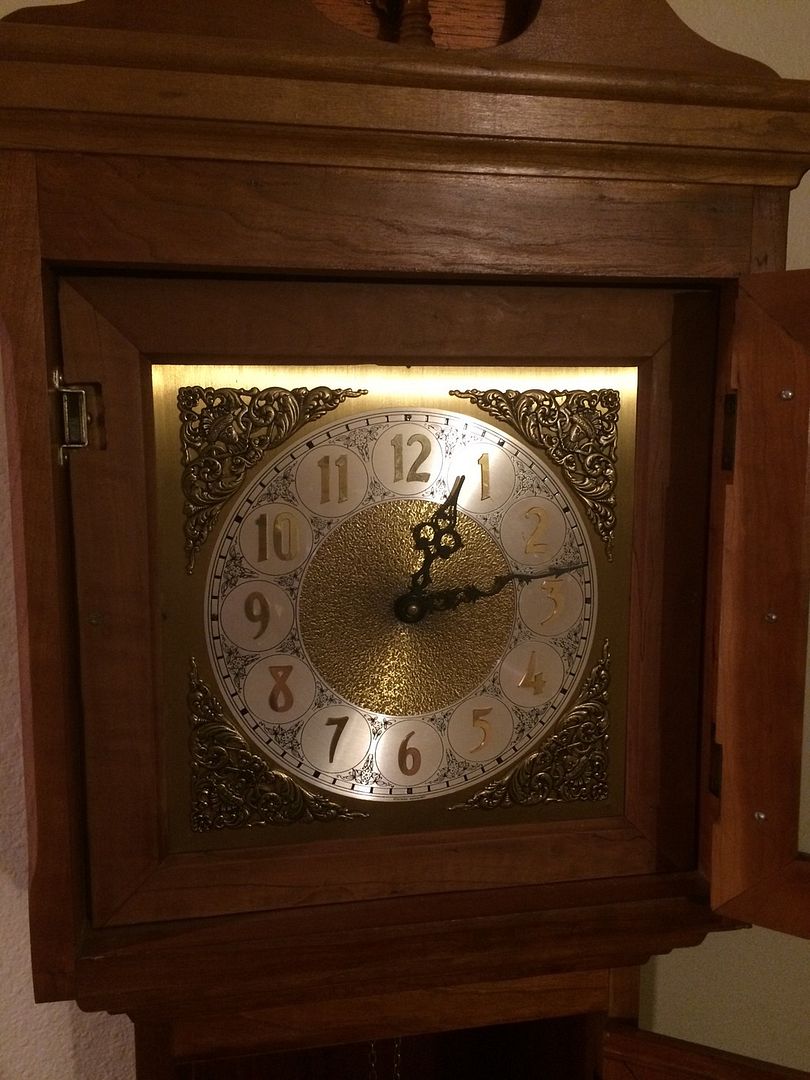
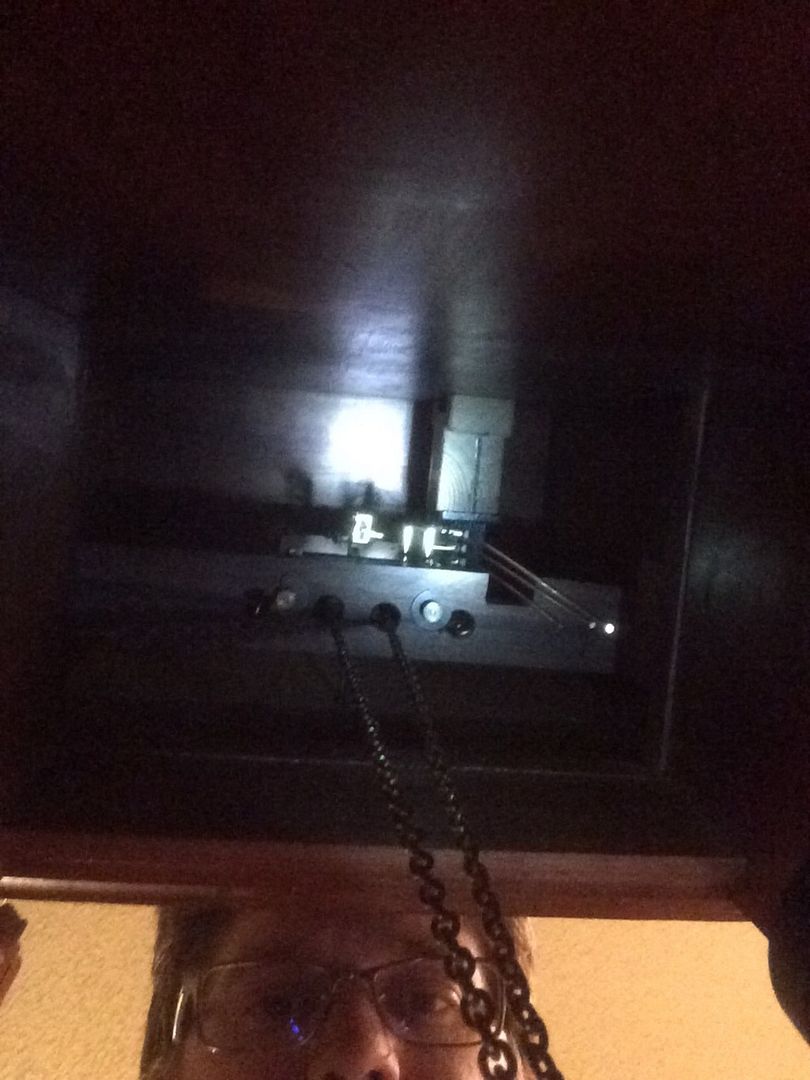
Once that's done then it's a matter of sourcing kiln tried 1/4" thick Spanish cedar to line the entire interior. After that I then need to figure out the right way to get lights in it, get fans for circulation and also how to make the trays. It's a long project ahead but I haven't had a project this big that will require real work and real hours in quite a while. I will be documenting with pictures and journaling through this whole thing! Below is the pics of the clock as it sits now for the beginning status....
Comments
-
Good luck Brett. That will be a cool humi. But you mentioned 1/4 inch thick SC. Maybe you could more easily lline it with thinner sc. And, you may already know this but, just in case you don't, spanish cedar sawdust can be a big respiratory hazard. Much more-so than regular sawdust. Even bringing the sawdust home on your clothing can be a concern if your family has a high respiratory sensitivity to the cedar dust. Might need to educate yourself on all that (if you aren't already) before you start cutting the SC.0
-
Thanks Bob and appreciate the heads up, had forgotten that the sawdust was hazardous so I appreciate that! As for the thickness and sizing it is really dependent on pricing and availability, my heart isn't set on a certain thickness or size. I would love to find someplace somewhat local that I could get the cedar from but I'm not sure if anyplace near me has that. I would prefer not to go from the net only for the cost of shipping reasons but that may not be an option. I will likely make the trays from something other than Spanish cedar simply for availability and aesthetics because I doubt it will have any significant impact when compared to all of the other cedar that lines the entire vault cavity.Bob Luken:Good luck Brett. That will be a cool humi. But you mentioned 1/4 inch thick SC. Maybe you could more easily lline it with thinner sc. And, you may already know this but, just in case you don't, spanish cedar sawdust can be a big respiratory hazard. Much more-so than regular sawdust. Might need to educate yourself on all that before you start makin' sawdust.
I've got a rough idea of what and how to do the whole process for the cedar and vault and cavity and how to assemble. The part that currently I am clueless on is lighting and air circulation. My goal is to be able to plug in a power cable as I do not want any of this to be battery powered since that would get expensive and a pain to replace batteries every few weeks or months. I know I want at least one or two fans in the base of the vault cavity and one or two near the top pointing down to circulate. Wiring and soldering are easy as that's a skill I developed for many years being an automotive mechanic. So wiring it up and putting in a switch to turn the fans on or off should be an issue same with the lights. I just need to figure out where to source things and ten construct the wiring diagram and make sure that will work. Any ideas, musings, help or suggestions are appreciated. I am trying to do this on a budget obviously but I will be doing this nicely. Will be if signing and staining the whole outside and Amanda said she wanted to take some real time and effort making the outer structure very refined and elaborate so I'm excited to see what she comes up with."When walking in open territory bother no one. If someone bothers you, ask them to stop. If they do not stop, destroy them."0 -
Hey Brett cool idea! Someone built a big cabinet humi and posted it here... he had some really cool strip-led lights that looked really good. Plugged inot wall too, not battery operated. I'll look for the thread.LLA - Lancero Lovers of America0
-
Thanks Gray, I am wondering if you are talking about Walt's BFH?Gray4lines:Hey Brett cool idea! Someone built a big cabinet humi and posted it here... he had some really cool strip-led lights that looked really good. Plugged inot wall too, not battery operated. I'll look for the thread."When walking in open territory bother no one. If someone bothers you, ask them to stop. If they do not stop, destroy them."0 -
yup! I was gonna say bigass humi or something, lol90+ Irishman:
Thanks Gray, I am wondering if you are talking about Walt's BFH?Gray4lines:Hey Brett cool idea! Someone built a big cabinet humi and posted it here... he had some really cool strip-led lights that looked really good. Plugged inot wall too, not battery operated. I'll look for the thread.LLA - Lancero Lovers of America0 -
Cool Idea man, I've done a few similar projects myself, one of the things I've learned is for sealing the cabinet I use a waterproofing membrane (liquid rubber) It's low voc during application and zero voc when cured and install the cedar over that. I don't know what your skill set or shop set up is, what I do know is that milled Spanish Cedar online or at someplace like Woodcraft or Rockler is EXPENSIVE if you can find a REAL lumber yard you can buy rough cedar and mill it yourself for about 1/4 the cost, this is what I do but then I have a full blown shop set up. Hit me up if you have any questions.0
-
Killer information Nathan thank you and I absolutely will be reaching out!!! If you have a brand or even a link for the sealant I'd be very appreciative! As for shop ours is mostly setup for metal and automotive so it will be a little interesting lol, but I do have a router and router table, miter saw, sanding blocks and clamps etc etc but nothing like a full blown wood shop, but I'm used to finding unique solutions and uses of tools to accomplish what I need lol."When walking in open territory bother no one. If someone bothers you, ask them to stop. If they do not stop, destroy them."0
-
Maipe makes the membrane, You can get it at Lowes or any tile supply house that carries Mapie? not 100 % on the spelling, SC is very soft and easy to work, when you buy rough stock you get a large chunk of board and have to resaw it to size and sand or plane it smooth a bandsaw is best, most of the stock I get is 8/4 or 9/4 by 8-10" wide by 12-14' long. Bob is right about the dust I have to wear a respirator even with the shops dust collection on. I can pm you my # as well.0
-
Thanks Nathan would really appreciate that and the information is fantastic! I wish I had some more specialized woodworking equipment but will just make do with what I have access to right now. As for the Maipe, just want to make sure I am not misunderstanding, when you say a membrane you are referring to a tube of sealant, similar to if you picked up a tube of caulking right? Thanks again! - Brettonestrangeone:Maipe makes the membrane, You can get it at Lowes or any tile supply house that carries Mapie? not 100 % on the spelling, SC is very soft and easy to work, when you buy rough stock you get a large chunk of board and have to resaw it to size and sand or plane it smooth a bandsaw is best, most of the stock I get is 8/4 or 9/4 by 8-10" wide by 12-14' long. Bob is right about the dust I have to wear a respirator even with the shops dust collection on. I can pm you my # as well."When walking in open territory bother no one. If someone bothers you, ask them to stop. If they do not stop, destroy them."0 -
No, It's a liquid in a bucket, you brush or roll it on and it turns to rubber.90+ Irishman:
Thanks Nathan would really appreciate that and the information is fantastic! I wish I had some more specialized woodworking equipment but will just make do with what I have access to right now. As for the Maipe, just want to make sure I am not misunderstanding, when you say a membrane you are referring to a tube of sealant, similar to if you picked up a tube of caulking right? Thanks again! - Brettonestrangeone:Maipe makes the membrane, You can get it at Lowes or any tile supply house that carries Mapie? not 100 % on the spelling, SC is very soft and easy to work, when you buy rough stock you get a large chunk of board and have to resaw it to size and sand or plane it smooth a bandsaw is best, most of the stock I get is 8/4 or 9/4 by 8-10" wide by 12-14' long. Bob is right about the dust I have to wear a respirator even with the shops dust collection on. I can pm you my # as well.0 -
Ahhhh now I am following, thanks for the clarification! I should be able to take a few more detailed pics tonight of some of the potential problem areas and update. Thinking of maybe doing a rough sketch up of what I see this looking like and how I envision it and that should help to solidify and clarify how I want this to go in my head. If I do then I will post up that as well, should be useful for others to look at that might spark an idea of a better way to do it or challenges to watch out for if I try to go this route or that route etc.onestrangeone:
No, It's a liquid in a bucket, you brush or roll it on and it turns to rubber.90+ Irishman:
Thanks Nathan would really appreciate that and the information is fantastic! I wish I had some more specialized woodworking equipment but will just make do with what I have access to right now. As for the Maipe, just want to make sure I am not misunderstanding, when you say a membrane you are referring to a tube of sealant, similar to if you picked up a tube of caulking right? Thanks again! - Brettonestrangeone:Maipe makes the membrane, You can get it at Lowes or any tile supply house that carries Mapie? not 100 % on the spelling, SC is very soft and easy to work, when you buy rough stock you get a large chunk of board and have to resaw it to size and sand or plane it smooth a bandsaw is best, most of the stock I get is 8/4 or 9/4 by 8-10" wide by 12-14' long. Bob is right about the dust I have to wear a respirator even with the shops dust collection on. I can pm you my # as well."When walking in open territory bother no one. If someone bothers you, ask them to stop. If they do not stop, destroy them."0 -
Here are some of the drawings and sketches of what I was thinking of, forgive the crude nature of the sketches. As for the circulation fan I am not sure if it is better to go with one bigger one or two or three smaller ones just not quite sure.
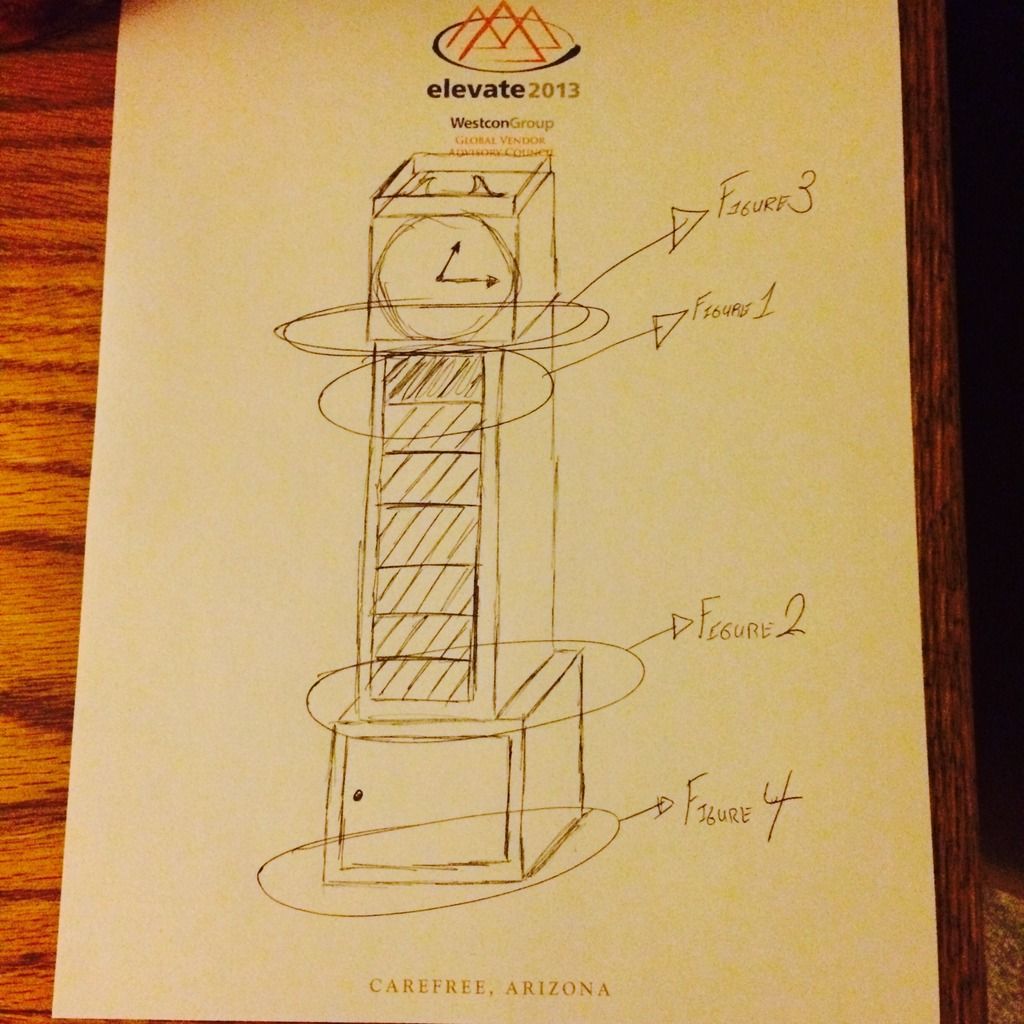
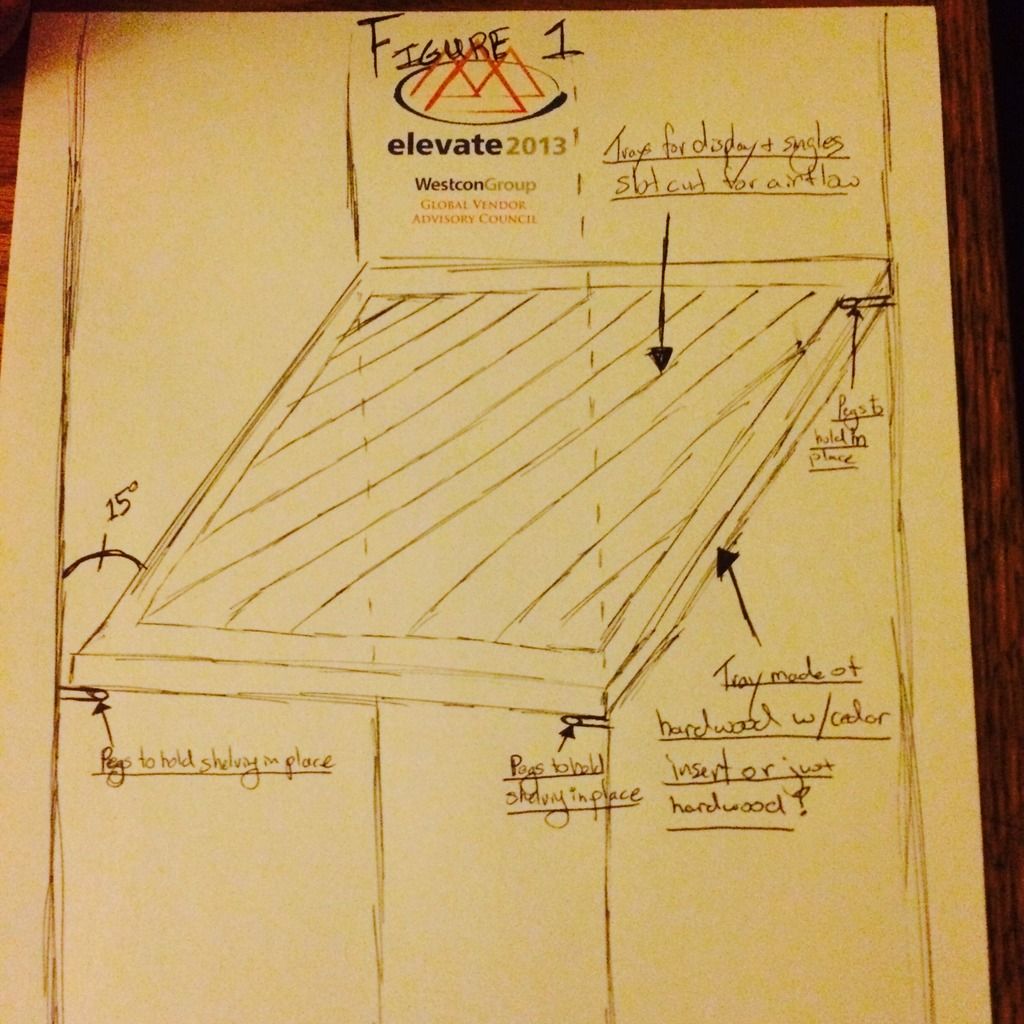
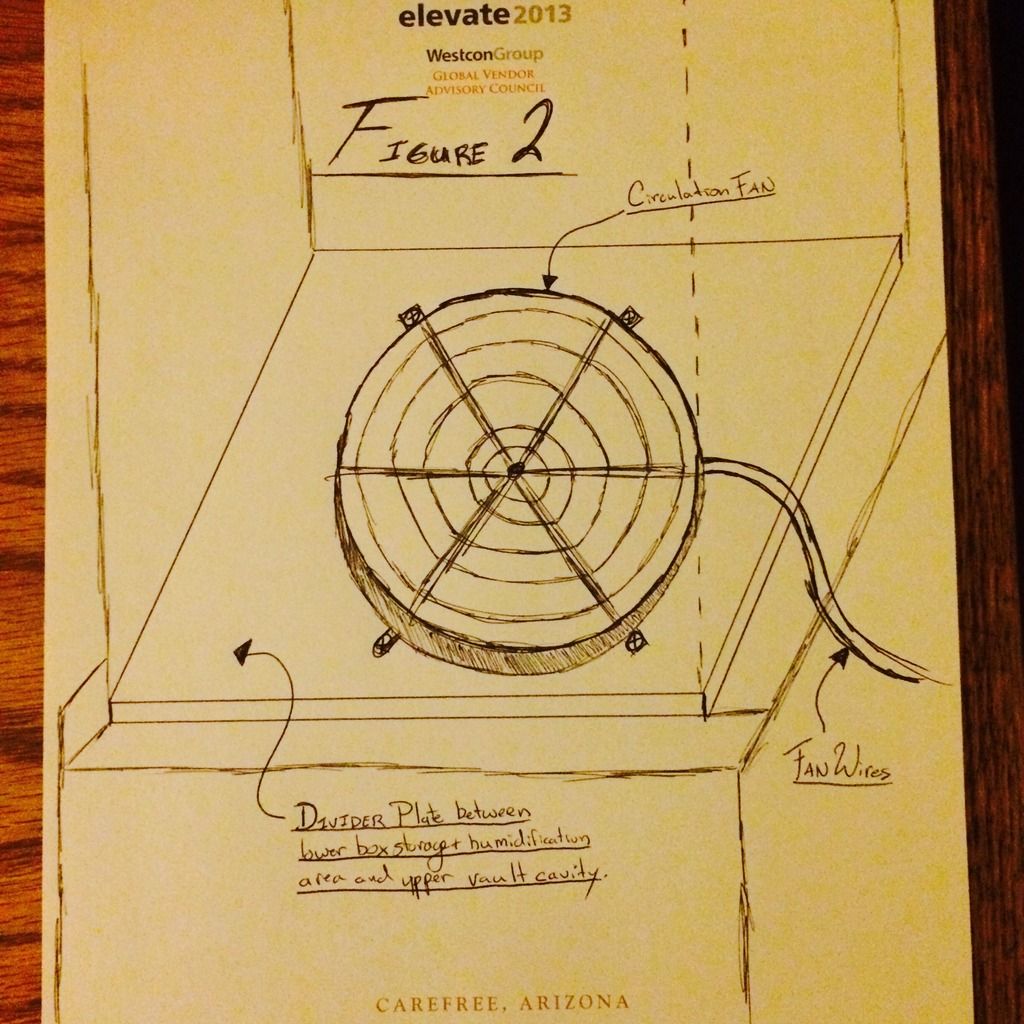
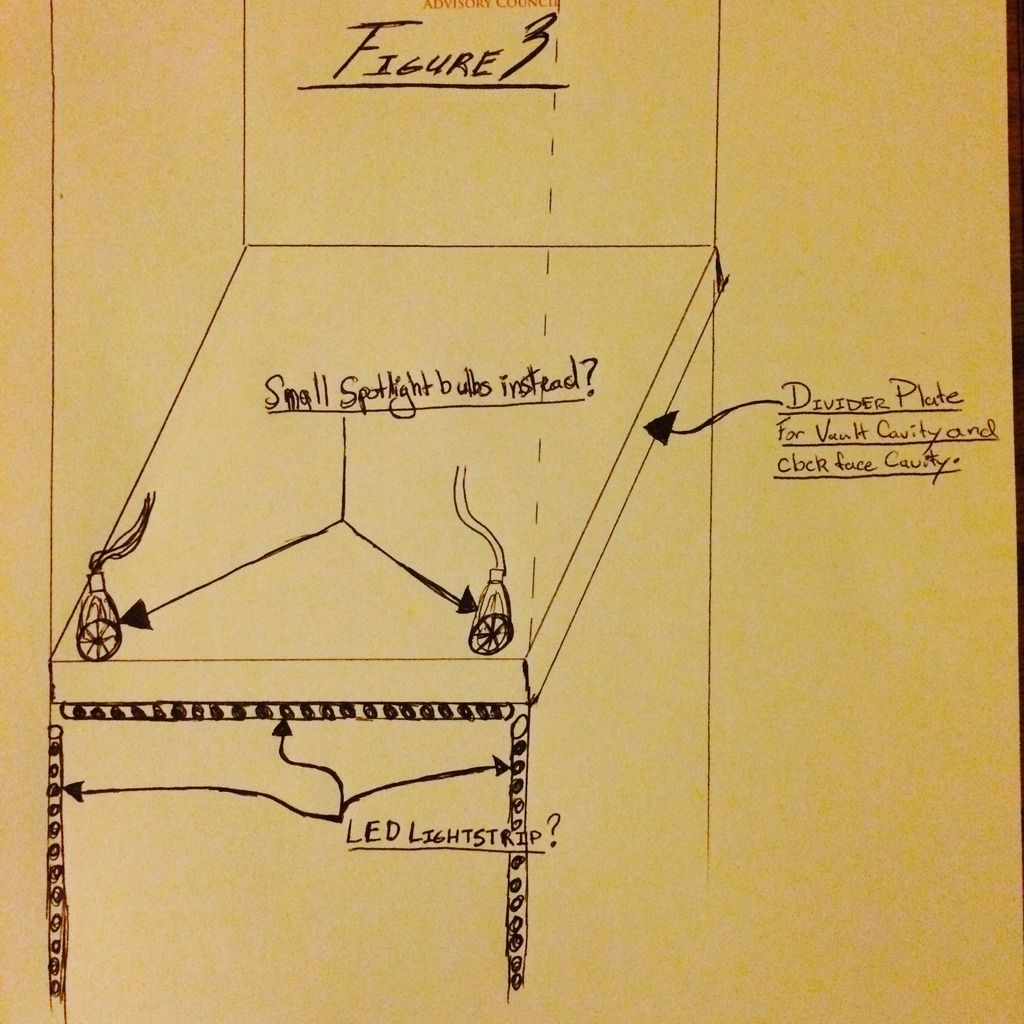
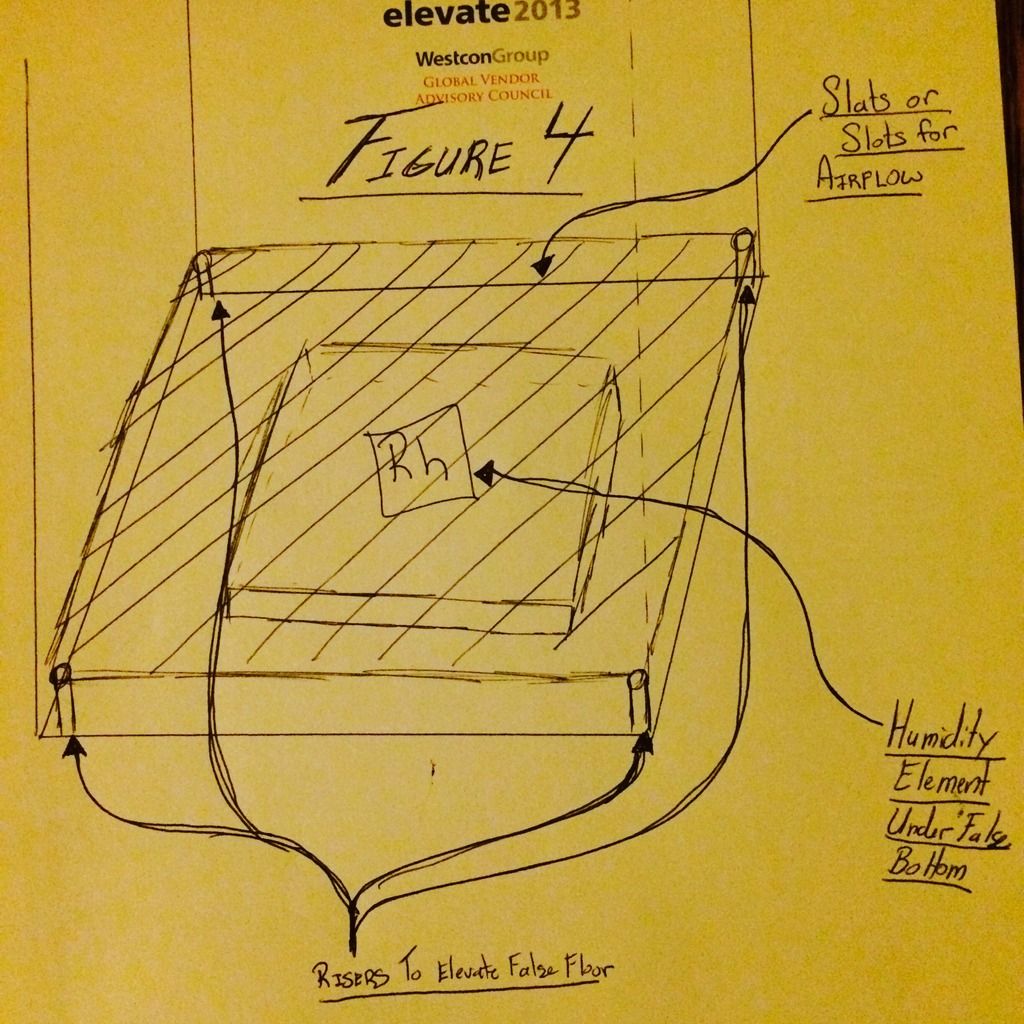
"When walking in open territory bother no one. If someone bothers you, ask them to stop. If they do not stop, destroy them."0 -
Can't wait to see this turn out, wish I had half your ingenuity and ambition Brett. Oh, maybe I've been sipping my whiskey wrong, lol. You're creating a family heirloom there bro.0
-
PM to ya0
-
Hey 90+_Irishman,
Any updates?
This looks like a cool project!
-Jay“There’ll be two dates on your tombstone and all your friends will read ’em but all that’s gonna matter is that little dash between ’em.” -Kevin Welch0 -
I can't give you any help, only admiration, I can't drive a nail straight. It looks fantastic though and I can't wait to see the finished product.
0 -
A 240mm computer fan would probably work. They are pretty cheap and are already made to be mounted.0
-
You ever finish this, Brett?
I am the Troll Jesus. Follow me, my children, or clutch your pearls tightly.
@ScotchnSmoke still sux lots of large wéiners. And tons of small ones.2 -
Why did I get WTF's on this one?
I am the Troll Jesus. Follow me, my children, or clutch your pearls tightly.
@ScotchnSmoke still sux lots of large wéiners. And tons of small ones.0 -
I gave you an insightful to prove my innocence @VegasFrank , since I gave you one this morning. I always announce my WTF's unless it's an obvious situation that doesn't require it.
4 -
It's the glove doesn't fit, you must acquit! I don't mind the WTF. I have plenty of them. And they're always looking for friends. I'm just wondering, in my most un JD voice, why I got them.
I am the Troll Jesus. Follow me, my children, or clutch your pearls tightly.
@ScotchnSmoke still sux lots of large wéiners. And tons of small ones.0 -
@VegasFrank said:
Why did I get WTF's on this one?@90+_IRISHMAN: Last Active February 1st. WhoTF do you expect a response from? BTW, I didn't WTF you, just helping find a possible explanation.
Join us on Zoom vHerf (Meeting # 2619860114 Password vHerf2020 )0 -
Brett, always nice and inspirational to see someone making stuff. Sometimes I have to set down what I'm making and walk away for a time. Making stuff always teaches the maker.
1


