I made this.

WaltBasil
Posts: 1,757 ✭✭✭
I am a hardcore X-Files fan. Watched what I could when I could while it was running, but sometimes Uncle Sam had other plans for me causing me to miss many episodes; sometimes entire seasons due to field exercises, deployments, and overseas tours. I was able to make up for it when they became available on DVD. I remember paying upwards of $150 per season as they became available a season at a time. Over time, prices for seasons fell horrifically, resulting in being able to purchase an entire season for $30-50. Now I can watch it all on Netflix for my monthly fee of $7.99.
At the end of each episode after the closing credits runs an animated clip where someone in the presumed audience abruptly calls out I MADE THIS! After watching so many episodes, I knew exactly when to say it in order to say it along with whoever it is making that statement. TMI? Get over it. I like the different types of those closing animations that run after the closing credits. Gives it a personality. Bad Robot. What does this mean? Etc. There are all kinds and Im always watching for them. If Im lucky and my show gets renewed for another season, sometimes these little clips change from time to time. Slowly evolving. Most often due to budget increases. But I digress.
Ive shameless stolen the I MADE THIS plug and use it when Im unveiling my latest creation or achievement to my wife. I call it my IMT. Ive noticed there are many BOTLs making things here. Lots of creative achievements. From bookmarks to our beloved Stogie Stands to HUD development for the birds to doors and furniture. I always enjoy watching the progress. I can see in my mind the end result and Im doing it. My wife cant. So she is always totally shocked. Shell say Thats what you meant when you said that I couldnt picture it.
So how about we share our different creations here? I think its always great to share ideas and procedures. Maybe someone else will get the inspiration to create their own and report back here with it. Maybe Ill learn something or two watching what you all did. Ill start it off with my kitchen island. We had a kitchen table, but that was used mostly for collecting items. A shelf, if you will. It was too low to actually do any real kitchen duty on it. Heh. I said duty. I didnt like the islands that were optional with the house when we bought it. Added too much price for what I actually would get. I knew Id just build my own and it would be as big as I wanted.
I went to Lowes and bought an unfinished kitchen sink cabinet that I liked the cupboards on and used that for the actual island. The problem was, none of these kitchen sink cabinets had drawers. Presumably because you would have a sink in the way. So those drawer looking things were just place holders. I wanted drawers up there, so I also bought a smaller unfinished cabinet just to steal the drawers out of and install them into the sink cabinet. I made the bar portion of the island extend way out from the cabinet - I wanted plenty of room. We picked out the tile that most closely matched the rest of the tile in the kitchen; floor and other counter tops in the kitchen. Watched a lot of youtube videos about laying tile, because thats exactly what you are doing with the counter tops laying tile. What you wont see in the pictures is where I had to drill through the floor tile and foundation to insert the lead anchors that the island mounted to in order to keep it secure.
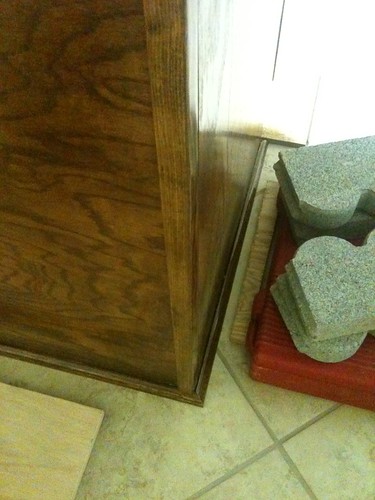
Captions are for the immediately following picture.
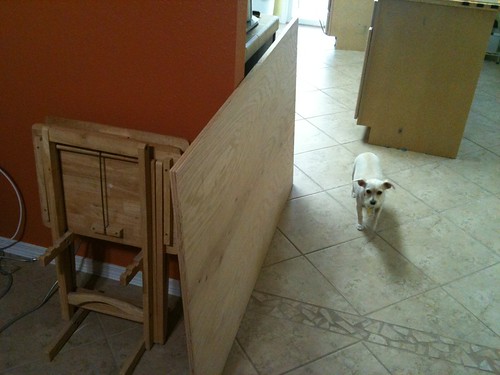
Here you can see both unfinished cabinets. The large sink one and the smaller one in the back used for the drawers. The oak back panel is on the left leaning against the wall. And thats Dolly, our old lady (Jack Russel/Chihuahua mix) we rescued from death row.
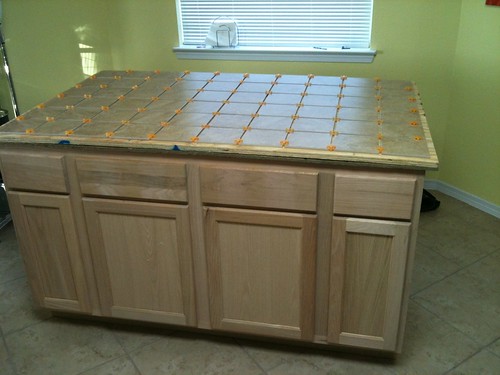
Here the drawers are installed but no knobs mounted yet, the top is laying over the island, and tiles laid out on top with spacers just to get an idea of the size. Instead of making a top and then laying the tiles and eventually cutting tiles to match, I laid tiles out and based the size of the top off of how many tiles I wanted to lay and not have to cut any to size.
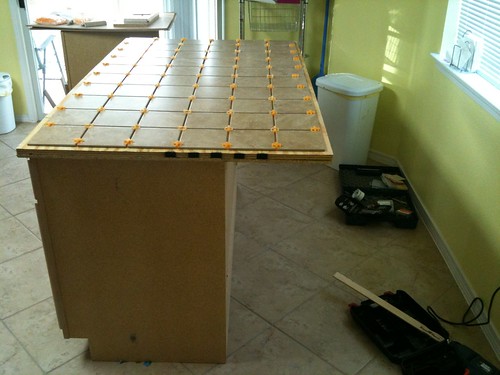
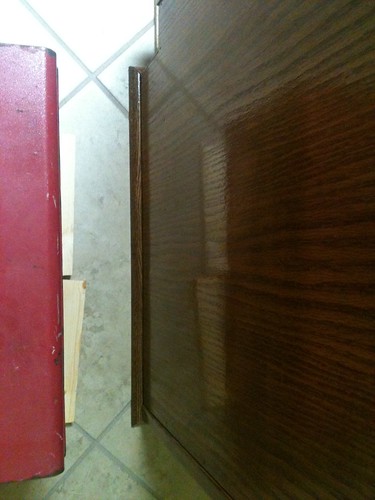
Side view, same time as above, showing how much the bar overlaps the island.
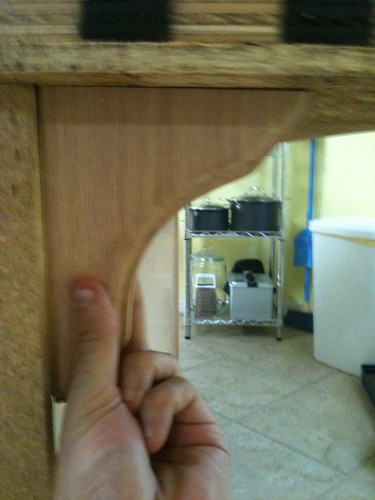
Since the bar does extend further than most, I attached 3 brackets for support along the back. Just in case.
Corner trim applied with both nails and glue. Heavy objects placed along them to keep it tight all night long while the glue cured. All paneling and doors are oak. All the trim is pine. The wifes excellent mixing and thinning of the stain made it all look like oak. When you apply the same stain to different types of wood it always looks different. She did well. She does all my staining and finishing. Its so much easier that way. ;-)
Other side, same concept. Heavy things were used to let the glue cure overnight. Plus there are brad nails in it all. I was determined to make sure they would not come loose over time and floor mopping and vacuum bumping.
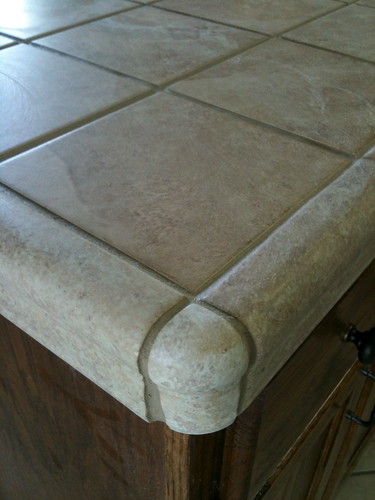
Completed view where you can see how closely it matches the other counter tops and the floor tile as well as the other cabinets.

Close up of the tile and grout.
At the end of each episode after the closing credits runs an animated clip where someone in the presumed audience abruptly calls out I MADE THIS! After watching so many episodes, I knew exactly when to say it in order to say it along with whoever it is making that statement. TMI? Get over it. I like the different types of those closing animations that run after the closing credits. Gives it a personality. Bad Robot. What does this mean? Etc. There are all kinds and Im always watching for them. If Im lucky and my show gets renewed for another season, sometimes these little clips change from time to time. Slowly evolving. Most often due to budget increases. But I digress.
Ive shameless stolen the I MADE THIS plug and use it when Im unveiling my latest creation or achievement to my wife. I call it my IMT. Ive noticed there are many BOTLs making things here. Lots of creative achievements. From bookmarks to our beloved Stogie Stands to HUD development for the birds to doors and furniture. I always enjoy watching the progress. I can see in my mind the end result and Im doing it. My wife cant. So she is always totally shocked. Shell say Thats what you meant when you said that I couldnt picture it.
So how about we share our different creations here? I think its always great to share ideas and procedures. Maybe someone else will get the inspiration to create their own and report back here with it. Maybe Ill learn something or two watching what you all did. Ill start it off with my kitchen island. We had a kitchen table, but that was used mostly for collecting items. A shelf, if you will. It was too low to actually do any real kitchen duty on it. Heh. I said duty. I didnt like the islands that were optional with the house when we bought it. Added too much price for what I actually would get. I knew Id just build my own and it would be as big as I wanted.
I went to Lowes and bought an unfinished kitchen sink cabinet that I liked the cupboards on and used that for the actual island. The problem was, none of these kitchen sink cabinets had drawers. Presumably because you would have a sink in the way. So those drawer looking things were just place holders. I wanted drawers up there, so I also bought a smaller unfinished cabinet just to steal the drawers out of and install them into the sink cabinet. I made the bar portion of the island extend way out from the cabinet - I wanted plenty of room. We picked out the tile that most closely matched the rest of the tile in the kitchen; floor and other counter tops in the kitchen. Watched a lot of youtube videos about laying tile, because thats exactly what you are doing with the counter tops laying tile. What you wont see in the pictures is where I had to drill through the floor tile and foundation to insert the lead anchors that the island mounted to in order to keep it secure.
Captions are for the immediately following picture.
Here you can see both unfinished cabinets. The large sink one and the smaller one in the back used for the drawers. The oak back panel is on the left leaning against the wall. And thats Dolly, our old lady (Jack Russel/Chihuahua mix) we rescued from death row.
Here the drawers are installed but no knobs mounted yet, the top is laying over the island, and tiles laid out on top with spacers just to get an idea of the size. Instead of making a top and then laying the tiles and eventually cutting tiles to match, I laid tiles out and based the size of the top off of how many tiles I wanted to lay and not have to cut any to size.
Side view, same time as above, showing how much the bar overlaps the island.
Since the bar does extend further than most, I attached 3 brackets for support along the back. Just in case.
Corner trim applied with both nails and glue. Heavy objects placed along them to keep it tight all night long while the glue cured. All paneling and doors are oak. All the trim is pine. The wifes excellent mixing and thinning of the stain made it all look like oak. When you apply the same stain to different types of wood it always looks different. She did well. She does all my staining and finishing. Its so much easier that way. ;-)
Other side, same concept. Heavy things were used to let the glue cure overnight. Plus there are brad nails in it all. I was determined to make sure they would not come loose over time and floor mopping and vacuum bumping.
Completed view where you can see how closely it matches the other counter tops and the floor tile as well as the other cabinets.
Close up of the tile and grout.
Post edited by TheCigarChick on
5
Comments
-
Very nicely done. I love the idea of not cutting the tiles, but making the sub-surface fit the tile instead! Very nice indeed!
0 -
Nice work, clean look. I like the countertop tiles.0
-
Very nice.0
-
Wow!! Well done... Looks like lots of drinks will be flowing!0
-
Wow, love it! Very nice work0
-
That finished out awesome Walt!
Great thread and I will share some. This is probably my favorite "IMT" ever. It's a tool chest I made for my dad as a fathersday gift is 2008. I inherited it back a couple years ago after he passed away. He got me into woodworking and he always wanted to make one of these for him self but never did. He refused to put it in his garage and kept it in the living room. He would go in the house to get the tool he needed then bring it back in when he finished using it. I looked at a Gershner tool chest for inspiration and did my best to make one fancy. I like doing this kind of stuff, try to test my skills and learn new techniques, hate cabinet work, it's just boring. Sorry for the pics, their from when I first got it back
Over all view with the front door closed.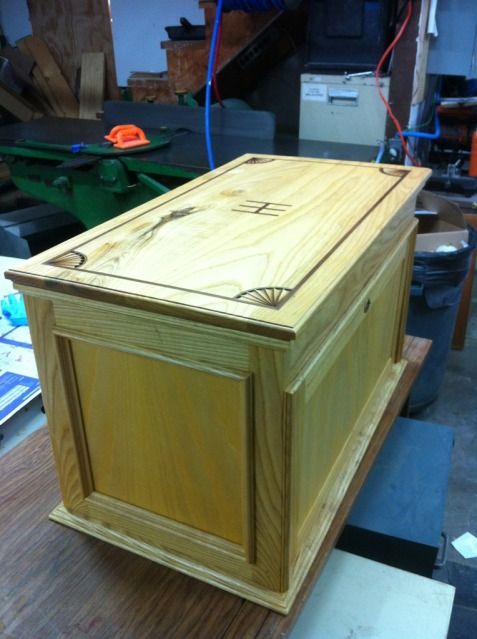
This is the lid with the inlays. His initials were "HH" and the fans in the corners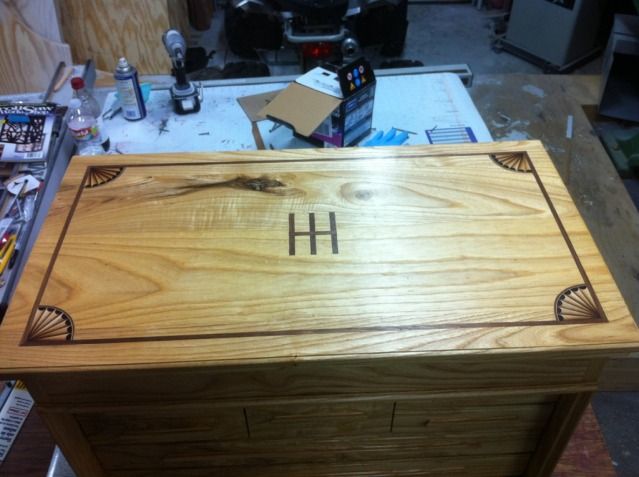
This is the drawers with the front door folded down and tucked up under the bottom drawer. All drawer fronts are from a single board of Ash that was resawen and cut in order so the wood grain continued from drawer to drawer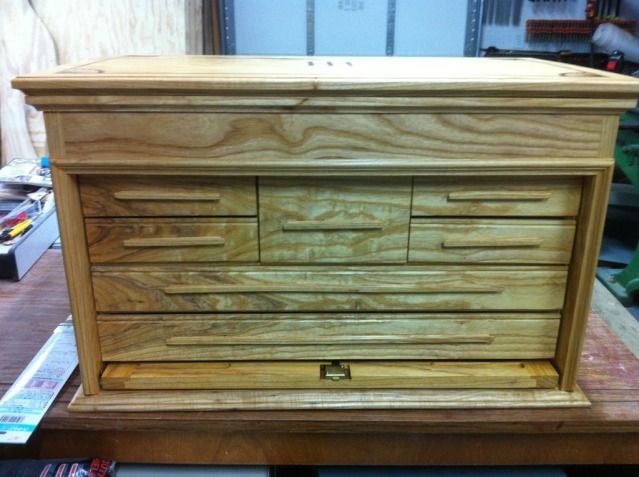
Bear with me please, going to post more pics but phone will only let me do a few at a time1 -
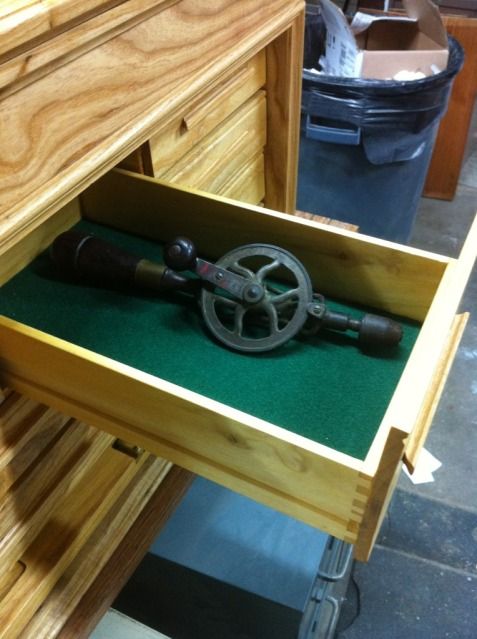
This drawer was made this this tool specifically in mind. It's a drill that was my grandfathers and I remember playing with it as a kid.
Top lid up and you can see the way I sign all my work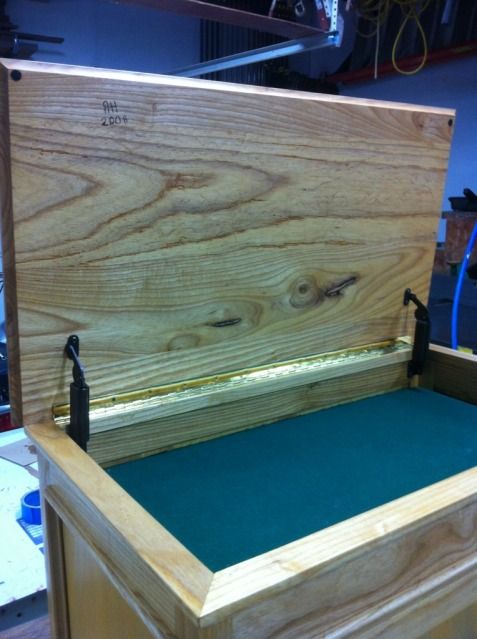
This is the best close up I have of the fan inlays. It took 17 different peices of wood to make each fan. The 3D shadow lines were done with a technique called sand shading, by taking each wedge of maple and placing them on their sides in a skillet full of sand on a hot plate.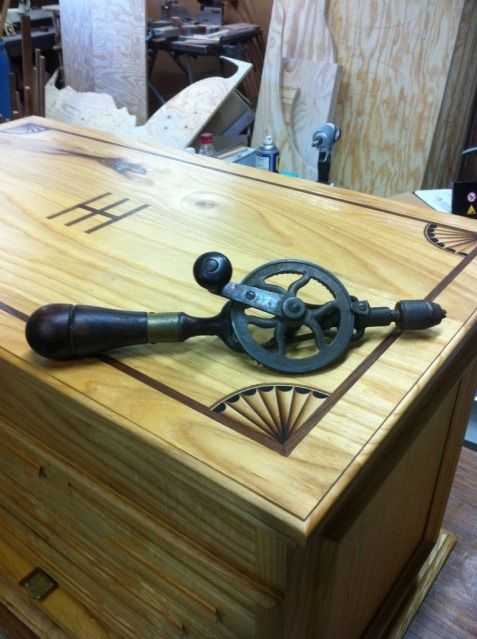 1
1 -
Couple more projects. I don't have many saved to my phone... so lucky for y'all I won't keep posting.
These were the gifts I made for my grooms man when I got married four years ago. Several were fireman hence the Maltese Cross's and my best man is a Texas Longhorn fan and my father in law is the one who did the ceremony so he got a cross inlayed in his. I bought some pocket knife's took them apart and made my own wooden handles.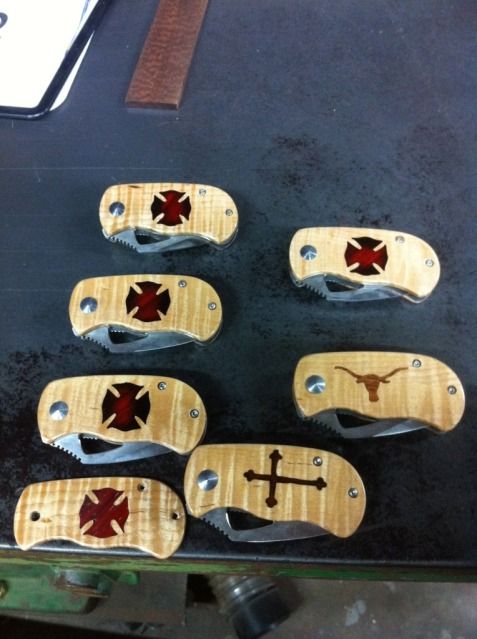
Then there is this.... The only form of woodwork I have done since my daughter was born three years ago. Some Christmas yard decorations! If I remember correct the tall one is 18 feet and each one took 9 sheets of plywood to make. Yep that's me in the middle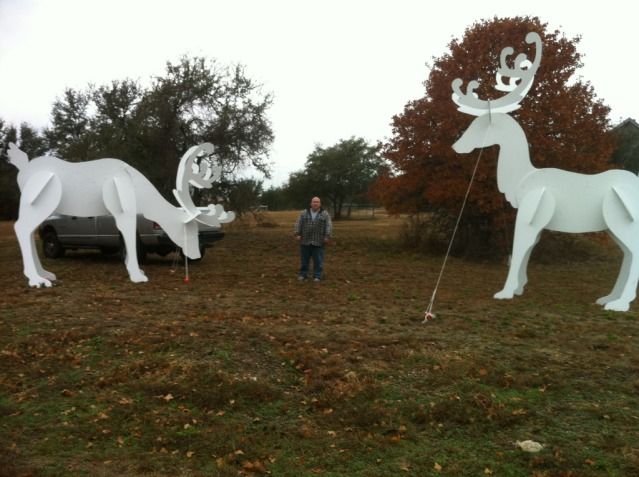
They look cool at night with some flood lights on 3
3 -
Those are amazing Rob! That tool chest is... Amazing. So much attention to detail. Love the way those drawers are cut from one piece for continuity of the grain. The knives... Such a personal gift. By the way... Sucking down a camacho Ecuador as I type this. :-)0
-
That is an beautiful tool chest Rob, I can see why he kept it in his house. Your father must have been amazingly proud when you gave it to him.0
-
You do beautiful work!FireRob:Couple more projects. I don't have many saved to my phone... so lucky for y'all I won't keep posting.
These were the gifts I made for my grooms man when I got married four years ago. Several were fireman hence the Maltese Cross's and my best man is a Texas Longhorn fan and my father in law is the one who did the ceremony so he got a cross inlayed in his. I bought some pocket knife's took them apart and made my own wooden handles.
Then there is this.... The only form of woodwork I have done since my daughter was born three years ago. Some Christmas yard decorations! If I remember correct the tall one is 18 feet and each one took 9 sheets of plywood to make. Yep that's me in the middle
They look cool at night with some flood lights on
1 -
Cool stuff! how did you figure out the pattern on the cutouts? Freehand it? Bandsaw or jigsaw? The knifes are good, love that curl maple.0
-
Really nice job. That tool chest will be around for many many years.FireRob:That finished out awesome Walt!
Great thread and I will share some. This is probably my favorite "IMT" ever. It's a tool chest I made for my dad as a fathersday gift is 2008. I inherited it back a couple years ago after he passed away. He got me into woodworking and he always wanted to make one of these for him self but never did. He refused to put it in his garage and kept it in the living room. He would go in the house to get the tool he needed then bring it back in when he finished using it. I looked at a Gershner tool chest for inspiration and did my best to make one fancy. I like doing this kind of stuff, try to test my skills and learn new techniques, hate cabinet work, it's just boring. Sorry for the pics, their from when I first got it back
Over all view with the front door closed.
This is the lid with the inlays. His initials were "HH" and the fans in the corners
This is the drawers with the front door folded down and tucked up under the bottom drawer. All drawer fronts are from a single board of Ash that was resawen and cut in order so the wood grain continued from drawer to drawer
Bear with me please, going to post more pics but phone will only let me do a few at a time0 -
I assume your asking about the Rein Deer? One of the few times I have used plans. Wife ordered them from a Winfield catalog if i remember correct. Included actual size paper patterns that I traced to the ply wood and used a jig saw to cut them out. Many of the parts (front legs, back legs, hips, antlers) are identical parts so I attached two or four pieces of 3/4 ply together and only had to cut it one time to get all the doubled up parts. The plans even showed where on the sheet of ply how to lay out the parts to get the most use of a single sheet.First Warrior:Cool stuff! how did you figure out the pattern on the cutouts? Freehand it? Bandsaw or jigsaw? The knifes are good, love that curl maple.
Thanks for the kind words0 -
Incredible work, guys!0
-
I've been a woodworker for years and like many forms of it but my favorite has to be woodturning. Second would be things like inlay work. My stepson retired from the post office and over the years he collected a few antique P.O. box doors. He asked me to build some sort of display case to show the doors off. I made this for him for Christmas one year.
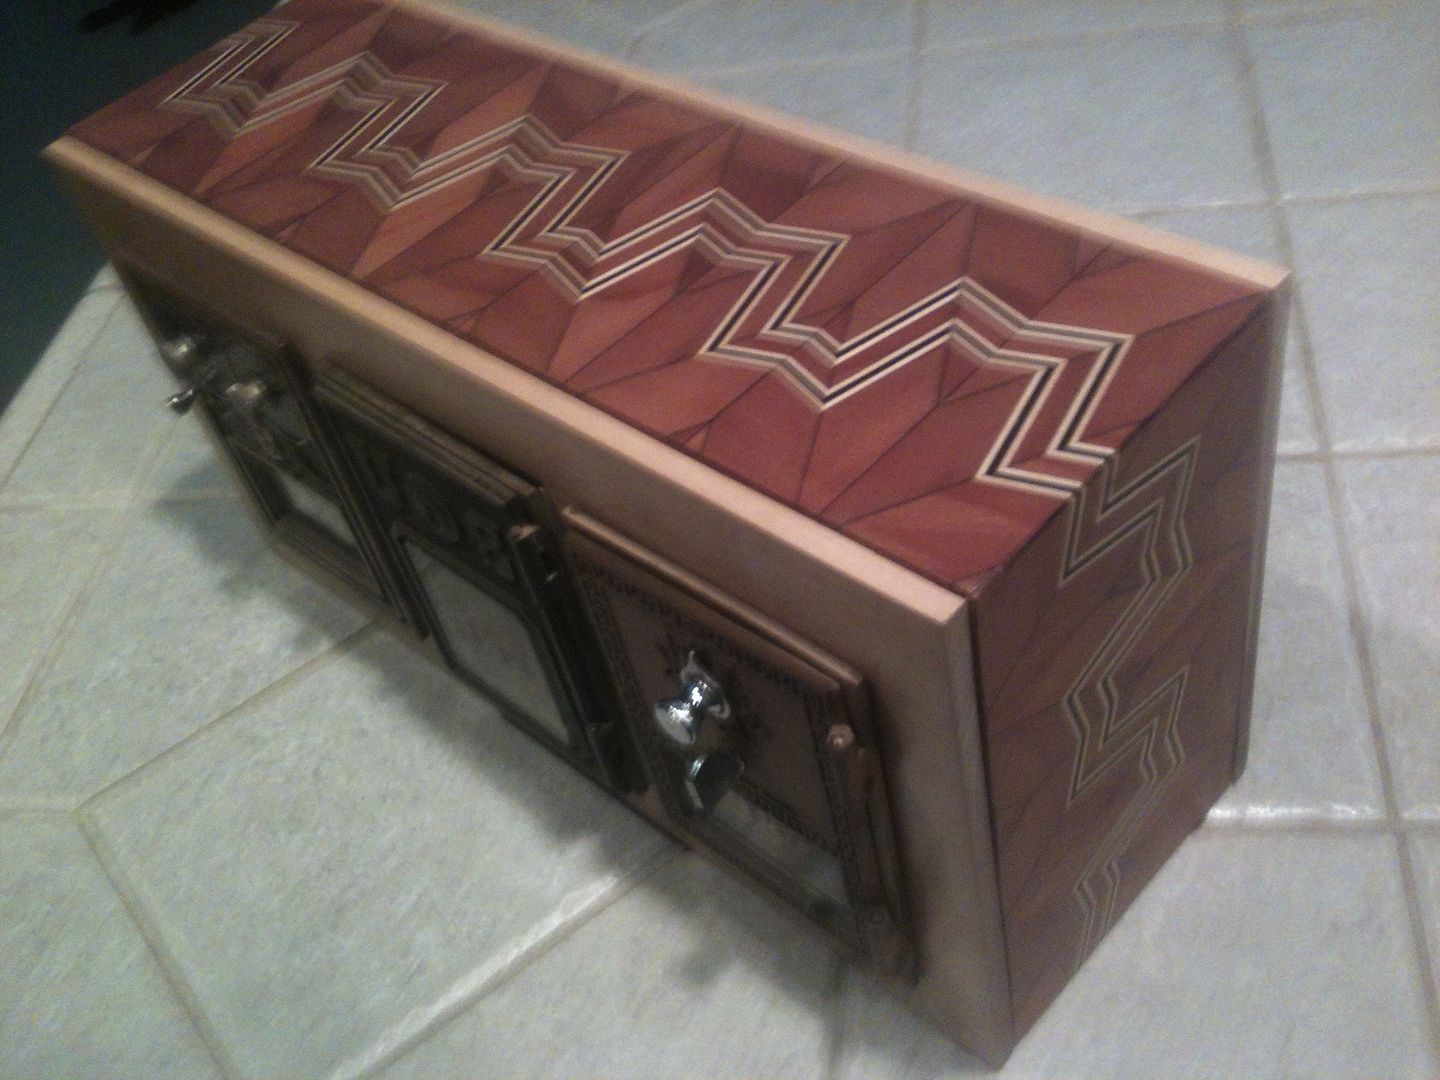
The front and rear panels are of cherry and are jointed into the case in a free-floating manner so as not to break a glue joint should they expand due to moisture/ humidity. The darker wood is redwood and the inlaid stripes are of sycamore and black-dyed pear wood.1 -
Jimarta, I've been a woodturner self supporting for 35 years. Turned a little walnut bowl this AM. I taught woodturning at Arrowmount School and John Campbell Folk School. Here's a image of one of my Sneaky Series natural rim bowls.jlmarta:I've been a woodworker for years and like many forms of it but my favorite has to be woodturning. Second would be things like inlay work. My stepson retired from the post office and over the years he collected a few antique P.O. box doors. He asked me to build some sort of display case to show the doors off. I made this for him for Christmas one year.
The front and rear panels are of cherry and are jointed into the case in a free-floating manner so as not to break a glue joint should they expand due to moisture/ humidity. The darker wood is redwood and the inlaid stripes are of sycamore and black-dyed pear wood.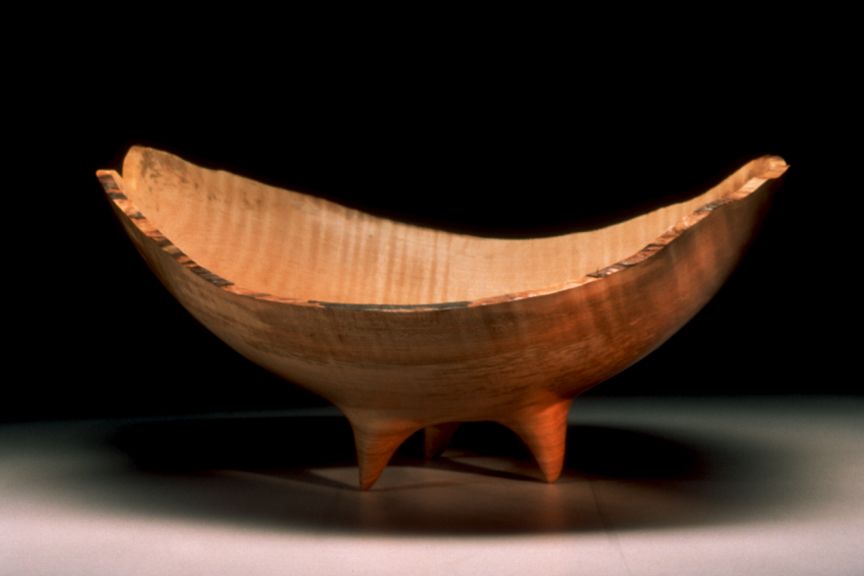 1
1 -
Will you guys please stop showing off. It's embarrassing. I tried making a humidor and it was a complete bust, the end table did survive. I tried making a biscuit bowl, it is hidden in the closet and will never see the light of day. I can replace a door knob, sort of.0
-
First Warrior:
Jimarta, I've been a woodturner self supporting for 35 years. Turned a little walnut bowl this AM. I taught woodturning at Arrowmount School and John Campbell Folk School. Here's a image of one of my Sneaky Series natural rim bowls.jlmarta:I've been a woodworker for years and like many forms of it but my favorite has to be woodturning. Second would be things like inlay work. My stepson retired from the post office and over the years he collected a few antique P.O. box doors. He asked me to build some sort of display case to show the doors off. I made this for him for Christmas one year.
The front and rear panels are of cherry and are jointed into the case in a free-floating manner so as not to break a glue joint should they expand due to moisture/ humidity. The darker wood is redwood and the inlaid stripes are of sycamore and black-dyed pear wood.
Wow! Very nice, Rodger. There's no way my amateur work can compare to your professional skill. But I probably enjoy doing it as much as you do. Lol. Here's a practice piece I did when I was trying to figure out how to make straight pieces of wood appear to be curved: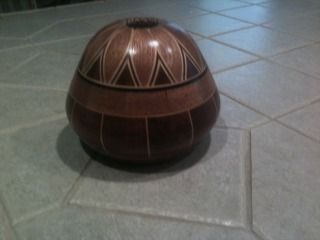
The flower petals came out pretty much as I had hoped.....0 -
Really nice hollow pot. I've never done a piece that took the care and planing of that pot. I just dig in and let her rip.0
-
Thanks. Here are a couple shots of another kind of turning that I've enjoyed. I call it "Tricky ****":
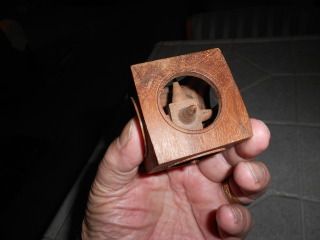
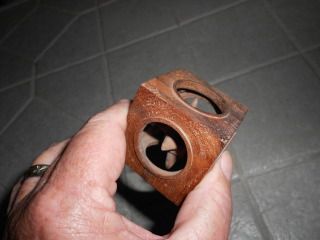
A walnut cube with a free-floating six-pointed star in the center2 -
That's friggin' awesome! Do you sell those?jlmarta:Thanks. Here are a couple shots of another kind of turning that I've enjoyed. I call it "Tricky ****":
A walnut cube with a free-floating six-pointed star in the center"When I have found intense pain relieved, a weary brain soothed, and calm, refreshing sleep obtained by a cigar, I have felt grateful to God, and have blessed His name." - Charles Haddon Spurgeon0 -
Puff_Dougie:
That's friggin' awesome! Do you sell those?jlmarta:Thanks. Here are a couple shots of another kind of turning that I've enjoyed. I call it "Tricky ****":
A walnut cube with a free-floating six-pointed star in the center
Thanks, Doug. No, I don't sell them because they're too labor-intensive to be profitable. I just did things like this and other turnings I've done for my own enjoyment. I've given away a few bowls to folks I owed a favor to, but most of the stuff I just keep.0 -
yeah... awesome! something like that looks so small and you think it should be inexpensive to purchase... but done by hand... wow. So much time and effort. Awesome work!jlmarta:Thanks. Here are a couple shots of another kind of turning that I've enjoyed. I call it "Tricky ****":
A walnut cube with a free-floating six-pointed star in the center0 -
Man you guys are sooo talented. I can do anything with wood except burn it.
Aj2 -
I'm starting to get back into scroll sawing, this was cut from a single piece of Baltic birch ply.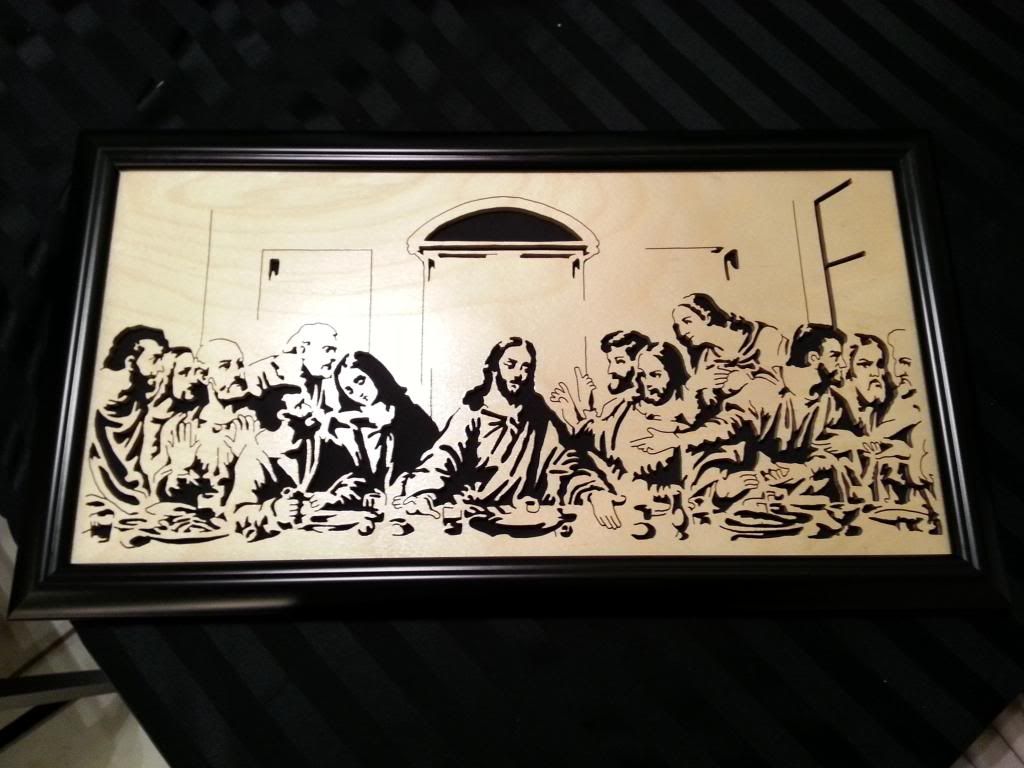 2
2 -
This is the type of stuff my wife makes. She has sent a number of prayer feathers to the troops.
 0
0 -
lonewolf2011:
I'm starting to get back into scroll sawing, this was cut from a single piece of Baltic birch ply.
I've got a scrollsaw (among other things) and I've tried my hand at it. But I couldn't come close to doing what you did, Matt. What's the size of that piece?0 -
It's 10x20. After a couple more portraits I want to try doing a large fretwork clock if I can find the time.jlmarta:lonewolf2011:
I'm starting to get back into scroll sawing, this was cut from a single piece of Baltic birch ply.
I've got a scrollsaw (among other things) and I've tried my hand at it. But I couldn't come close to doing what you did, Matt. What's the size of that piece?1